Caterpillar supports the MakerLab with a $7500 course and program grant

index.png

Caterpillar representatives visited the MakerLab in Spring to learn more about how our approach to learning by making, was resulting in innovative new solutions to real world challenges. They were also very interested in the way we were able to bring together students from different majors in teams to make these products. We thank Caterpillar for supporting the  Making Things and Digital Making courses, at the Lab for 2015-2016, with a grant of $7500.

"Caterpillar is committed to providing our customer with the best-built products and dependable solutions. To deliver the outstanding value our customers deserve, we need innovative ideas. That is why we partner with programs that enable the talent of the future to gain experience applying new and creative ideas in real-world settings," said Becky Modine, Caterpillar Americas North Recruiting Manager.


Caterpillar joins our list of partners, helping us create accessible and low cost facilities, to fail cheaply and learn by making.

Enabling the Future, one #3dprinted hand at a time

enable.jpg

A selection of the hands available on e-NABLING the Future's website

Guest Post by Nora and Sam, students in the first Digital Making class at the MakerLab.

This semester Nora and I worked with Enabling the Future on designing and printing 3D prosthetics. Nora found the company and Vishal helped with getting in touch with the e-NABLE team at SXSW. From there we had our first assignment. In order to be certified by e-NABLE to make prosthetic devices for real people, we had to first print and assemble a prototype hand. The designs are premade so they just need to be printed. In some cases, the hands or fingers need to be resized to fit the end user. Our first hand was called the Raptor Reloaded, printed in black and blue filament. Printing the materials was quite easy compared to assembling the hand. The instructions were available online with detailed pictures and descriptions. The assembling process taught us a lot about how best to make the hand and what were some obstacles that we faced. For example, a lot of the parts needed to be filed down so that it would fit easily together. We also worked with the tension in the fingers so the hand would move properly and learned how to tie some pretty complicated sailor knots that the site suggested we use for the hand.


After the first hand was sent in, we decided to print another Raptor Reloaded to be used as a sample in the Maker Lab for future students that are interested in the project. The process was very similar to the first one except we didn’t have all of the assembling materials needed for the hand such as the strings, screws, and Velcro. Enabling the Future sells packages that cost around $25 for materials for the Raptor Reloaded. Instead of buying another package, we improvised with some of our own materials. Feel free to check out the hand in the Maker Lab during open hours!

Screen Shot 2015-05-11 at 7.19.20 PM

Towards the end of the semester, the e-NABLE team got back to us about a real recipient, his name is Bruce and he is a 53 year old male from North Carolina. He is missing three of his fingers on the right hand, so instead of making a prosthetic hand we were tasked with making replacement fingers. Some sizing needed to be done in the fingers, but other than that the prints were ready. The instructions for the Owen Replacement Finger were also available online; however, they were not as detailed as the Raptor hand. We also had to improvise on getting the necessary materials such as a glove, needle and thread, and elastic, which were not available in a pre-made kit for this type of hand.

Screen Shot 2015-05-11 at 7.19.34 PM

The MakerLab will keep working with the e-Nable organization, and enable students to create an impact and learn digital fabrication at the same time.

Meet the Maker : Arielle Rausin

Guest post by Arielle, Mark, Sebastian , students from the first Digital Making class in Spring 2015 
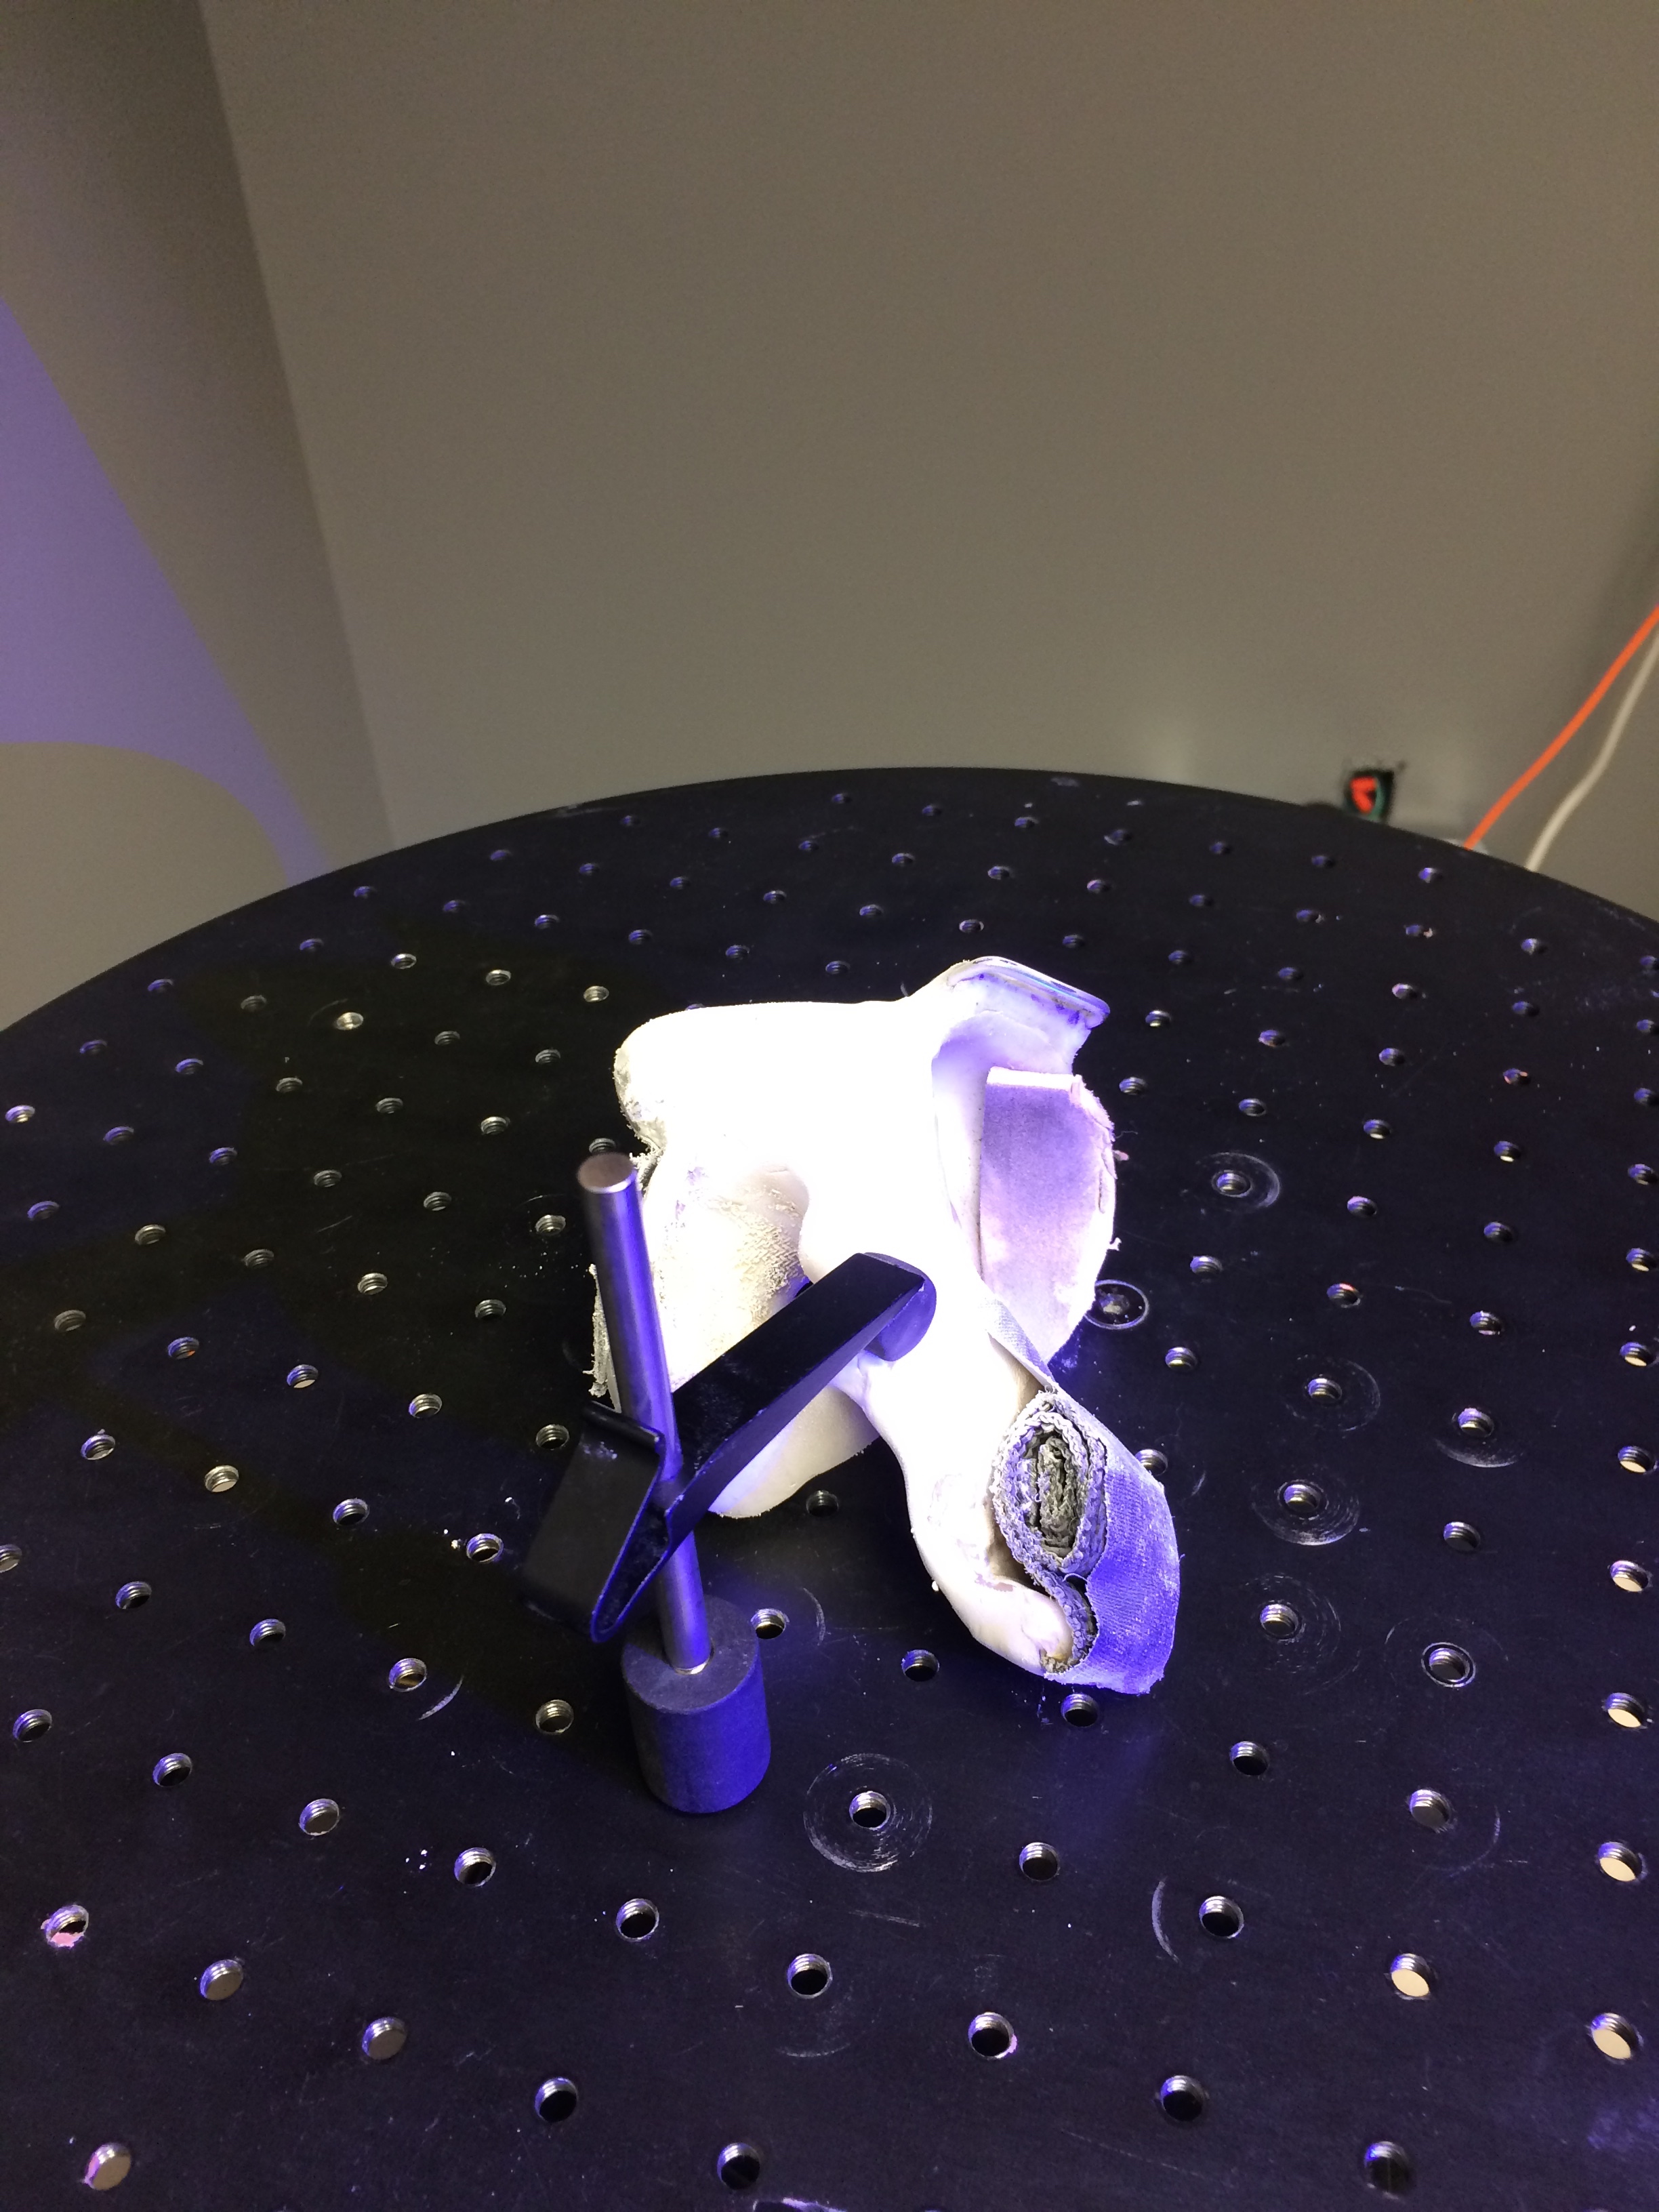
We were already well into the first month of class, and I still couldn’t decide what I was going to do in my semester long project . Then Vishal told us we were taking a field trip to the Beckman Institute of Advanced Science and Technology, with the assignment of bringing an object to 3D scan. I racked my brain for a while trying to come up with an object that was interesting and maybe held potential to be turned into something more.

2015-03-03 3D Scanning - 5784
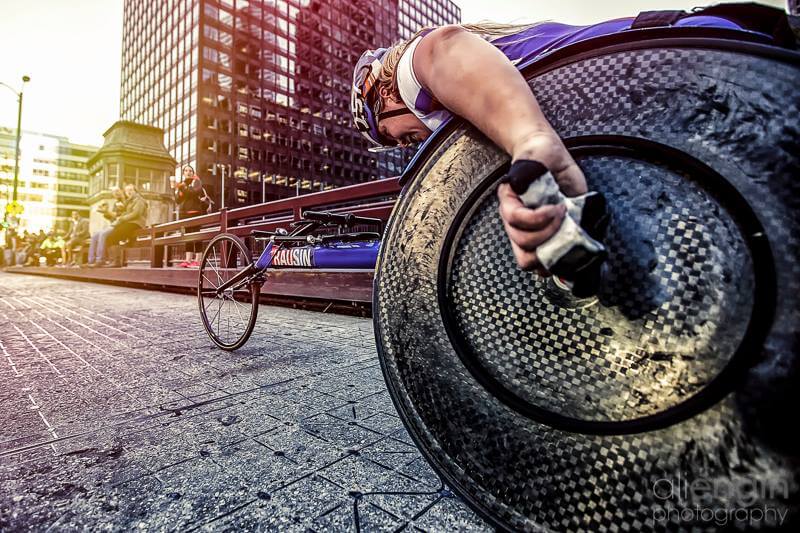
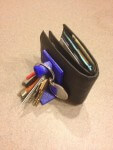
Then later, at track practice, my coach suggested trying to scan one of the handmade gloves we use to race. Usually the gloves take hours and hours to make- custom fit for each racer, not to mention their 350.00 dollar price tag. One pair will last a long time, but since they are so unique they can never be exactly duplicated. This sounded like the perfect kind of item to try and scan, because having a 3D model that you could print over and over again would open up many possibilities.Sebastian and Mark were also interested in this project, so the three of us set out to try and make the world’s first 3D printed wheelchair racing glove! IMG_7091
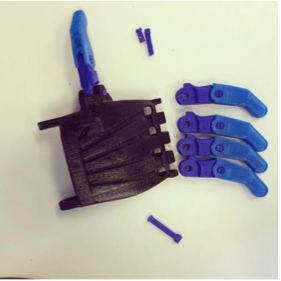
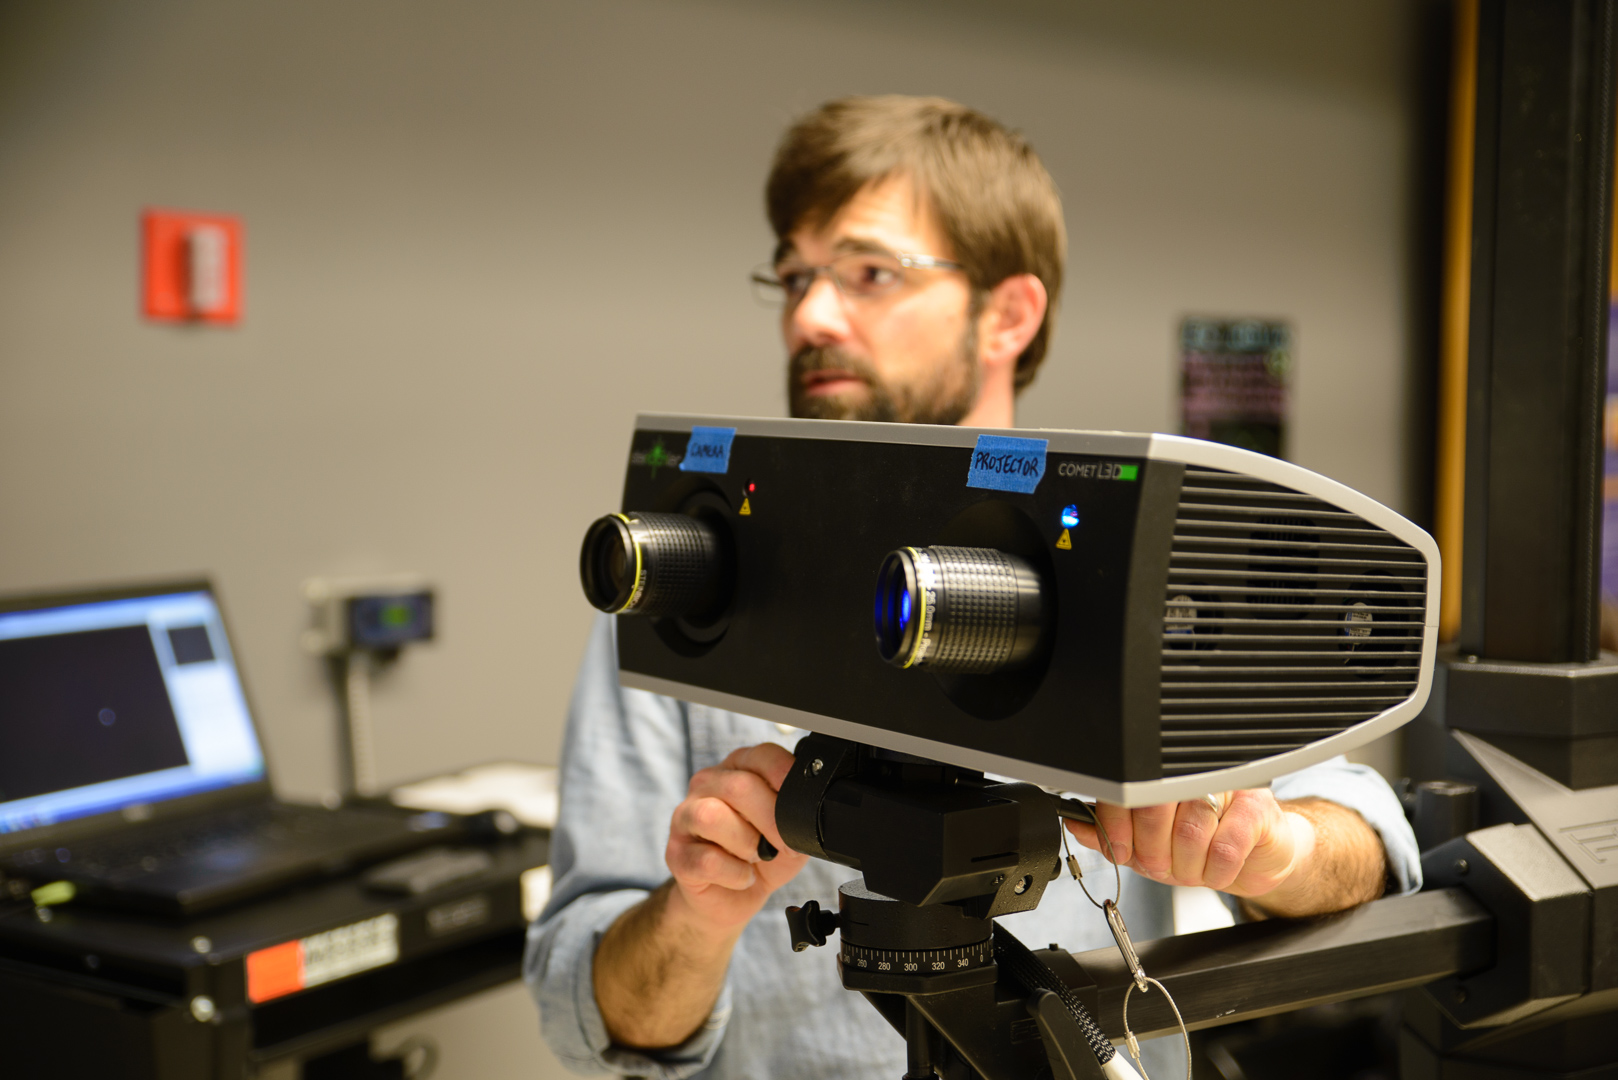
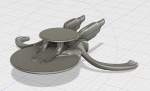
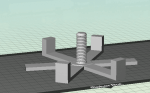
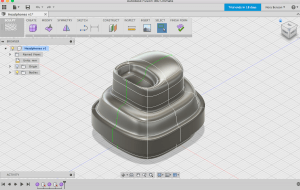
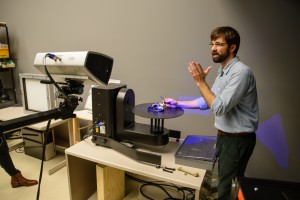
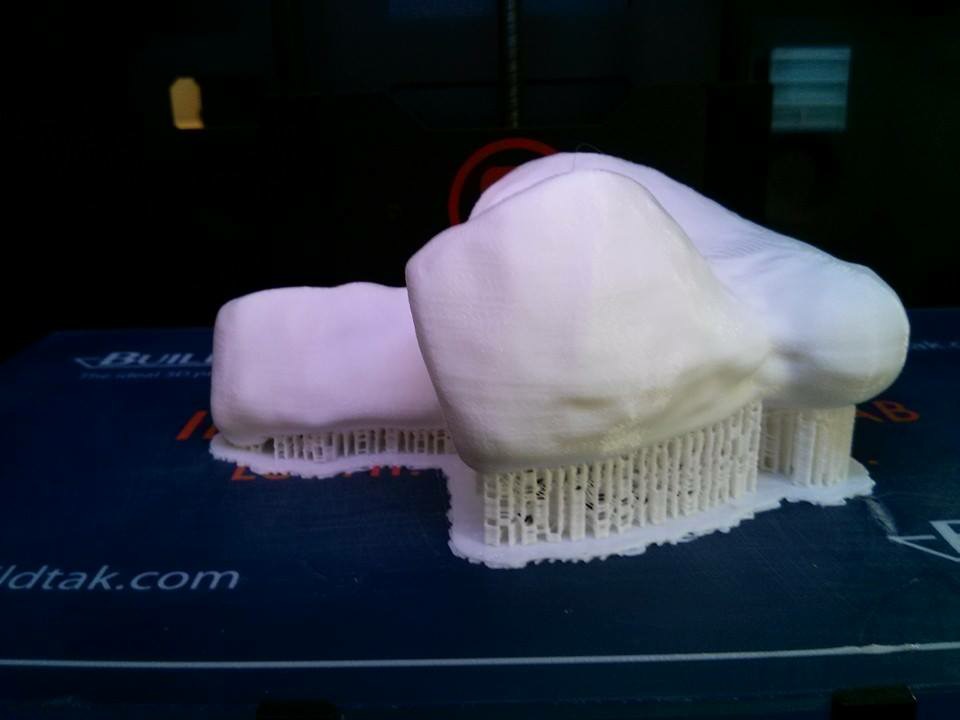
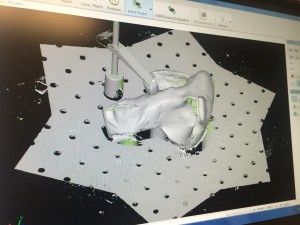
After Travis (from the Visualization Lab over at Beckman) completed the scan and cleaned up the glove file, we were off to work! We were incredibly lucky and barely had to manipulate the design at all in Geomagic because the scanner was so precise. Surprisingly, the very first time we tried to print our glove, it worked! Afterwards, when trying to make duplicates, we had a lot of trouble positioning it correctly on the raft so print would not fail, but eventually we figured out the best angle and direction to place the glove in order for the prints to continuously be successful.


IMG_7192 
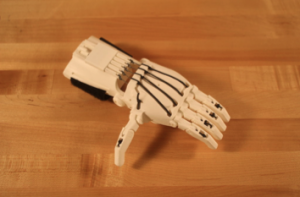
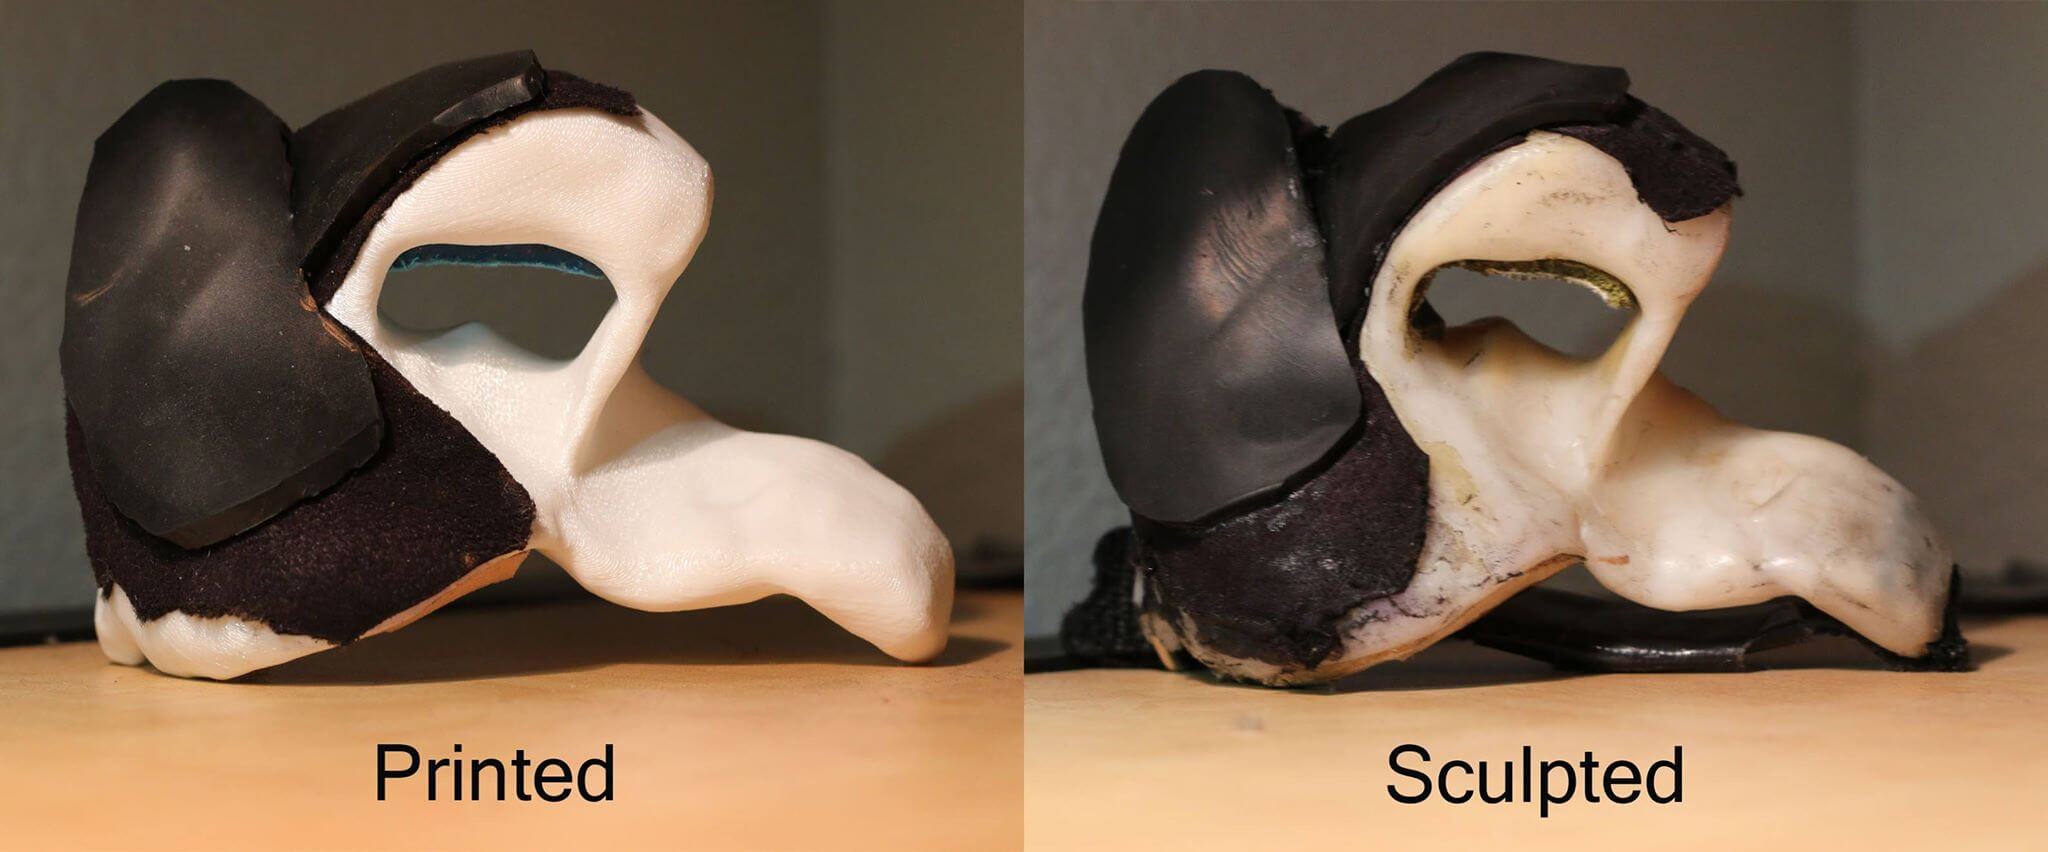
Once we had our first printed glove, we got to work testing it. I added the additional materials needed to generate grip when pushing at high speeds- some suede and rubber- and encountered a little trouble getting these materials to stick to a different kind of plastic than I was accustomed to.

IMG_0384
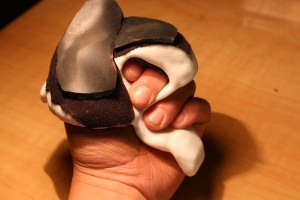
Once I discovered that using contact cement was the best method, I started putting the glove to good use! We were very excited that the glove held up after just using it for one training run, but we’re happy to announce that the glove is still working perfectly after over 200 miles of force and exertion.


IMG_7456The next step was mirroring the 3D glove file in order to print another glove for my right hand. Once we figured that out, I added the same extra materials and used the gloves to race in the 2015 Boston Marathon. They worked beautifully!

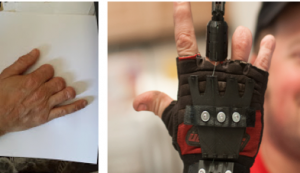
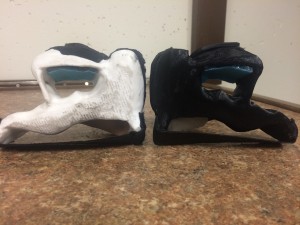
The things that make this project so successful though were all of the benefits we discovered after the prints proved their durability. For one thing, the plastic that we printed with is incredibly lightweight. My original gloves weighed 174 grams each, and the printed glove only weighs 70 grams. It may not sound like much, but this, I’ve noticed, makes a significant difference when using the gloves to climb hills and push at high speeds. Their lightweight quality also aids in injury prevention. It is common among wheelchair racers to get tendonitis in the wrist from overuse, but the 100 grams that the printed gloves shave off put less stress on the tendons and hopefully decrease the risk of injury. The cost is another great advantage! To print a single glove cost only 4 dollars, that’s a lot of green left in your pocket from the original pair costing a minimum of 300 dollars. The repeatability is probably the greatest benefit here though. The fact that you could print multiple pairs of gloves for different weather conditions could be a huge advantage when racing. Some of the world’s best athletes lose important races because they weren’t prepared for the conditions, whether it was rain, humidity, or even snow. Now that we found a way to print the perfectly fitting glove, it is possible to make many, many varieties.

Here is a short interview where I am talking about this project with Vishal, the Director of the MakerLab.

https://youtu.be/AhLMsJ3Pdvg

Our next step is to help everyone on the University of Illinois’ Wheelchair Racing team to get their own pair of printed gloves! We’ve started scanning more and more pairs and the team is getting excited. Eventually we would like to discover a process to create a pair of gloves from scratch- just by scanning an athlete’s hand. Over the summer we will continue to explore different methods so potentially people all across the world could buy a pair by simply sending us a file of their scanned hand.

We are very excited to continue pursuing this project, and hope to see it keep growing into the future! The uses for 3D scanning and printing are endless, and it is so thrilling to be a part of discovering why!


Update 10/17/15 : Watch Arielle in action with the gloves in Chicago!

arielle in Chicago

Digital Making: What Have We Been Up To?

Screen-Shot-2015-02-17-at-4.52.55-PM-e1425075328182-121x150.png

Ideation and Product Development This entire semester, our class has been learning a great deal about the process of making and what it means to take an idea from early beginning thoughts to full execution. We had the privilege of learning about the Maker Movement from Prof. Kylie Peppler who teaches at Indiana University. We've learned about the inherent value of thinking like a 'maker' and learning about the different ways that we can take a problem and transform into a tangible solution that can benefit others. Additionally, we've discuss the ideation process and learned how to approach the sequence of steps that it takes to actually develop a product. Design for America put on a workshop for us that helped us to see the different stages of innovation and how to ultimately get to your final product using principles like human-centered design.

3D Printing: Learning Platforms

Illinois MakerLab

Digital Making focuses on creating and making digitally through the medium of 3D printing. We have learned about a variety of different softwares that we can use to develop 3D models that can ultimately be printed at the Illinois MakerLab on MakerBot printers. The first platform we learned about was Tinkercad. This web-based tool allows users to easily create a model by providing pre-created geometries and basic tools to do things like create holes, construct letters and numbers, and modify the size/shape of the objects users work with. We then progressed to learn about Autodesk Fusion 360. This software is more sophisticated and allows for users to manipulate objects on many more measurements than a platform like Tinkercad and with greater amounts of precision. We also learned about a high-end software called Geomagic which essentially renders 3D scans, refines the scans with various tools, and parameterizes scans into models to ultimately be used in softwares like Fusion 360 or Autodesk Inventor. Gaining exposure to all of these different tools has been invaluable.

3D Printing & The Business Environment

In addition to learning about all the different methods and tools for #digitalmaking (also our class hashtag!), we took time to understand the implications that digital making has had and is continuing to have on today's dynamic business environment. 3D printing is becoming the disruptive technology of the future that has great implications for production processes, procurement, supply chains, and much more. Additive manufacturing, a corporate extension of 3D printing processes, is helping to lower product lead times and helping to optimize product manufacturing by lower costs and enabling customization. One of the first things you learn in this class is that complexity is not an obstacle when it comes to 3D printing and many digital making methods. This enables the production of objects with complex geometries that may have not been possibly on a larger scale before.

Technology Immersion and Exposure

Champaign-Fab-Lab

In addition to 3D printing and scanning methods, our class has learned many different techniques to make digitally. We've learned about arduinos and the use of e-textiles to create some very interesting things that require the use of circuitry and computer programming. Additionally, our class has been visiting the Champaign Fab Lab to learn and play around with other technologies. We've furthered our knowledge of how to use arduinos at the lab and we have also been playing around with digital embroidery and laser cutting technologies. Participating in sessions at the Fab Lab has enabled us to become makers with a myriad of new tools. As the course continues, we will continue to learn about technologies that are disrupting different making spaces and become more skilled in using these technologies.

Stay up to date with the reflections from students on our class blog at http://publish.illinois.edu/digitalmaking/ or follow our hasgtag #DigitalMaking on twitter.

Digital Making Class learns Scanning and Geomagic at Beckman

This is a Guest Post by Sam Bohner, a student in the Digital Making 2015 Class. The past couple of weeks, the digital making class went to the Imaging Technology Group at Beckman Institute where we met Geomagic guru, Travis Ross. There, he began to introduce us to the scanning equipment at Beckmann and to Geomagic software in the second week.

2015-03-03 3D Scanning - 5800 2015-03-03 3D Scanning - 5794 2015-03-03 3D Scanning - 5784

Geomagic is a CAD software that focuses mainly on preparing 3D products for print. It’s an extremely useful yet complex tool. Some classmates expressed the issues they encountered when using the software. Sebastian voiced in his post that the “software was a bit too powerful for us to learn in such a short time.” Kay, as well, expressed in her post that “we still have a lot to delve into about this software.”

In class, Travis went through a tutorial for the class that consisted of working with a scan done on a clay model. He went through the process of trimming, filling, smoothing, and dividing parts of the object all done in Geomagic. It is a fairly complicated process and the class tried their best to keep up with Travis.

IMG_0143

Travis also worked on cleaning up the racing glove that Arielle brought to Beckman for scanning. Anthony provided some background on the glove in his post:

"The plastic glove is custom made and extremely difficult to replicate for racers. Having a digital copy of a good glove means the ability for a user to create multiple copies using 3D printing!"

During the scanning process of the glove the week before, there were some issues capturing the surface of the glove. Travis decided to spray it with talcum powder so the beams from the scanner could bounce back to the computer. It took multiple scans to make a complete model in the software. It seems that with the right practice and expertise in this type of software that amazing things can be done.

Snapshot of the scanning process for the racing glove

After scanning it, Travis was gracious enough to spend a lot of time cleaning up the scan, and then helped the team get a printable model. The team is working on approaches to develop a workflow to print custom gloves for each of the racing team members.

Replica of a Racing Glove printed after scanning

The scan was then cleaned up , and here are the results!!

Molded Vs Printed!

Many classmates started to apply their knowledge of Geomagic to their lives. For example, Jill noted:

“I have a Tupperware container that I absolutely love to carry places when I want lunch on the go. Problem with it is, there’s no great way to carry cutlery with it. I want to scan this existing container, and further add on a pocket that carries forks and knives.”

Noah as well stated:

“…with this software caused me to think about the various economic applications of this technology. Perhaps, I will be able to create my own business concept around this technology. I still will need help to operate the scanner and software, but having this high level overview allows me to be able to think critically about using this technology in my own field.”

Geomagic is a powerful tool in 3D printing that has great potential. It is a little on the pricey side so I would recommend trying to obtain a free trial.

Fusion 360: Two Weeks Coming Full Circle

This is a guest post by a student in the #DigitalMaking class:  Arielle Rausin
The past two weeks our class has been working really hard to get a decent grasp of Autodesk Fusion 360. Because it is such an expansive and powerful tool- there is no possible way for us to master all of its features, but the goal is for us is to understand what can be done with the software, and develop a set of skills to make a basic 3D image from scratch.

After looking back on my classmate’s reflections, I was pleased to learn that I was not the only one who had difficulties starting out with the program. Noah voiced my thoughts exactly in his post,

“As I continue to work with Fusion 360, I am learning how to control and shortcut my way through this CAD. This program has had a faster learning curve than other new software I have tried in any regard. While I may struggle now, I know that as I continue working with this software, it will begin working for me.”

We’re all learning together exactly what can be achieved through the software - so now we’re just on the journey of figuring things out for ourselves.

Some people in the class have had prior experience with 3D design software, so it was interesting to learn their take on a unique program. Nora talked about how it differs from software she’s used in the past like Inventor.

“Fusion is quite an interesting modeling program because it integrates the whole product development process-from design, to engineering, to fabrication-into one cloud-based tool. Because Fusion 360 allows users to create certain geometries that would be difficult, if not impossible to create in Inventor in a matter of minutes.”

For a little background on Fusion 360; it was first released two and half years ago - but has undergone dramatic changes in recent times. It is one of the first technologies for direct modeling to bring together organic yet complex form design.

It was good to know that Fusion 360 stacked up well to its competitors. We have each put in at least ten to fifteen hours (minimum) with the program, and it would be painful to hear there was a software out there that would suit our needs better. But because so many of us are beginners not only in 3D design, but to the whole 3D printing process in general, it really seems like Fusion 360 is the exact tool we need to learn to use.

The first week during our introduction to Fusion 360 we had the privilege to hear a presentation by two Autodesk representatives, Jeff Smith and Chris Hall. They spent a solid three hours with us, helping us one on one, to design a lamp using the software. The amount of knowledge they possessed on 3D design was unfathomable to someone of my novice status, but listening to them talk about their careers in design was something I definitely appreciated. The skills and knowledge that we are gaining through this class are one-hundred percent applicable in today’s business world. Even beyond applicable- I would go as far to say they are actively sought after, and with the speed technology has been advancing at, I only expect that demand to sky rocket.

A week later after we had all completed our homework of designing a few more objects in Fusion 360, everyone seemed to have a much better grasp on program in general. I felt very similar to Gian in his post,

“I feel MUCH more comfortable with the Fusion 360 software now, and I feel much more capable of creating an object from scratch. I’m still learning about the different nuances of the software, but I feel confident in my ability to create a relatively simple object and modify it to meet certain specifications. “

For me, personally, I was able to navigate between the menus and viewpoints much, much easier the second week- and I also finally picked up the ability to customize measurements to an exact inch or millimeter- which proved incredibly handy when building more complex objects for personal use.

My classmates were able to print and design some really awesome things the past two weeks, and I’m really excited to move forward from here and see what we are able to produce next!